Search This Blog

Showing posts with label Terrain. Show all posts

Sunday, July 5, 2026

T1 Village of Hommlet Guard Tower Terrain Build – 28mm Oldhammer / Greyhawk Campaign Project

Completed 28mm scale Hommlet Guard Tower terrain piece in a scenic setting for Greyhawk campaign use
The Guard Tower in the Village of Hommlet
 

Over the years I’ve created a number of terrain pieces, many of them focusing on castles and forts, many featured here on the blog.

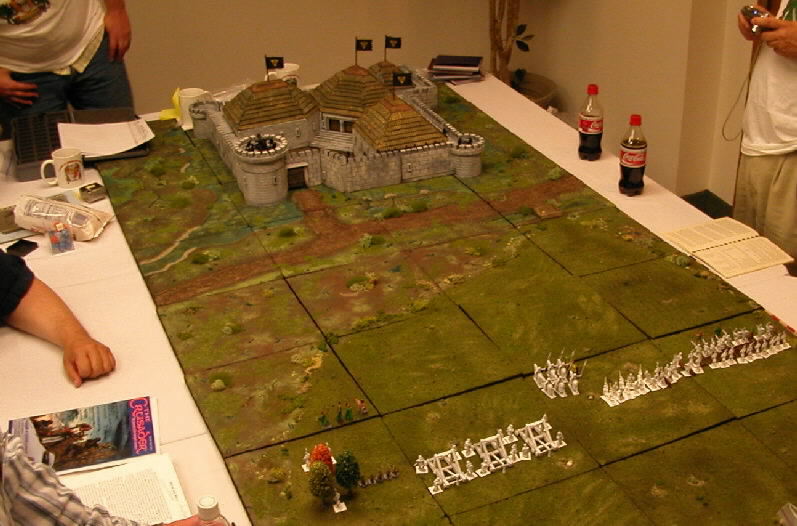
In that vein, for my Greyhawk Campaign I’m running I decided to make the Guard Tower from T1 - The The Village of Hommlet. The natural question is why not create the Moathouse, since that’s where the adventurers will mostly be plying their trade? The answer is simple: way back in 2006, Paul Stormberg commissioned a scale model version for a wargame of Chainmail which Gary Gygax himself participated in.

So rather than create another one, I settled on the Guard Tower (area #31) and have been working events in my Greyhawk campaign in which the tower will feature. But that is very much in the future, so I will just focus on the construction of the tower itself for this post.

The first step in construction was making a copy of the tower floor plans and taping it to the shelving in front of me on the painting table for reference through the whole thing. This was very helpful as I didn’t have to keep looking over to the module itself.

On that subject the floor plans of the tower were helpful. The illustration on page 7 and the back cover were less so. At least the illustration on page 7 did give me a good idea of the stairs if nothing else for later. The back cover really doesn’t tell much for this nor does the original cover art. This isn’t a criticism per se, it’s just noting for what I needed they would not be used as my guides.

To start the Material List:

  • Cardboard
  • Thinner cardboard (the types from cereal, snack, or cracker boxes)
  • Toothpicks (for the arrow loops and trap door on the middle tower)
  • Popsicle sticks (for the drawbridge and flooring of the 2nd floor)
  • A round container of oatmeal (serves as the middle tower)
  • Small finishing nails (for the studs on the door to the middle tower)
  • R4 residential foam (the base)
  • Pressboard (for the base of the 2nd floor)
  • Posterboard (for the battlements)
  • Paint
  • Superglue
  • White glue
  • Glue gun
  • Xacto knife
  • Stone gravel and green flock for the base
  • Coping saw
  • Dremel tool
  • Small electric drill
Construction
I actually started on the creation of the tower in early November 2025, but got sidetracked. Sidetracked by what you ask? My Citadel Giant, that’s what! When I picked it back up the tower was in the basic state noted here in the first photo. One of the initial challenges I had to work out was creating it in 25/28mm scale. It was going to be big no matter what. As I noted, I’ve created several castles in 25/28mm scale before along with a lot of buildings, but the initial cuts always seem “too big.”
Early WIP of the 28mm scale Hommlet Guard Tower basic cardboard form on the painting table
Very, very early WIP

The second challenge is that the interior was going to be a chore to even get remotely passable in terms of usability. For a while I debated on the wisdom of doing so. In the end I knew I’d have to create the interior and made peace with it. At the same time, looking at the floor plans I knew it would be impossible to do exactly as is. It was also at this stage that I decided to omit the lowest level as that was going to add another level of complexity and to the overall height.

The third and final challenge was using flat surfaces in a round structure. Trust me, it’s much more difficult than it sounds. Cardboard can be bent and cut, yes, but some shapes are not easy to do.

The first big task was to get the shape the right size for the tower proper along with the two flanking towers to be circular. I was ideally looking for a circle the size of a bucket but none fit what I was roughly measuring out. Through some trial and error I got it right after the second try.

Once that was done, creating the vertical walls was somewhat easier. The glue gun was invaluable here, keeping everything set while I added the next piece and the next. In short order the basic form was set and I went over the glue gun joints with white glue to reinforce them all. Then the tower sat for a number of months.

When I picked this back up about a month ago, I remembered the interiors would be a chore, but so too would the stone work for the outside. As you can see from the work in progress photos it was a LOT of cutting and gluing with the glue gun.

For the materials to make the stone I fortunately saved snack boxes over the years for construction. The excellent How to Make Wargames Terrain book from Games Workshop is invaluable for this. I have a copy but it has been out of print for decades (the 1996 version is the best in my opinion).

The attaching of the stone to the outer surface was a long process over about two weeks. As you can see it became something quite garish from all the clashing colors as I went! (see the photo to the right). The primary challenge here was containing/corralling the glue from the glue gun. The glue sets quickly and speed is needed to get the part in question into place before it sets without excess glue or wispy strings. The good thing is after doing it so many times it got to be second nature.

The first interior work was the hardest: the ramps. While it works fine for an adventure in role-playing

Color explosion during stone cladding on the 28mm Hommlet Guard Tower – snack box cardboard in progress
Color explosion!

games it does not work well for a modeling project, nor for lining up arrow slits. Hearkening back to my Nippon castle from several years ago I was eventually able to get the ramps passable and removable from the interior. Not perfect, just passable. I really, really wish Gary would have done something different here… The interior stones? As said it wasn’t easy, but I did get into a rhythm in some spots and listened to several podcasts to while away the time as I toiled.

The battlements were the next stop after the interior. Once again, a previous project helped here. I have not posted it yet, but I have created an entire Empire castle (see the very end of the post for more on this) roughly based on the Warhammer Mighty Fortress. In that castle project I figured out how to make battlements from poster board and to do it in such a way to expedite the process. Basically the key breakthrough was to lightly score the flat section that forms “in between” each battlement and fold it down. Coupled with a slightly higher battlement section behind, the two were glued together leaving only the sides of each battlement “tooth” to be completed.

The big roadblock here? As you guessed it, doing this on a round surface made it tougher. I had to account for the circumference being smaller on the interior than the exterior. Through trial and error I worked it out and then started attaching sections to the upper tower base.

The next big challenge was the roof and machicolations on the removable tower top. The machicolations took quite a while to get right as the spacing was at best an inexact science. Several times I needed to cut already glued sections off to get the whole to fit right. But after a while—with a lot of putting the top on, marking the under-hang, and popping it off—I was able to add them one by one.

Another point of note was the central tower itself. I’m fairly sure oatmeal containers are not designed with hobby terrain in mind despite being the perfect size and shape (let alone being sawed through). Because of that, getting it to set level took some time and some shims. In the end it worked perfectly with the right shape and diameter.

Removable tower top with machicolations and Wizkids catapults on the 28mm Hommlet Guard Tower
Removable top and catapults

Once the base construction was done and I repeated the method for the battlements on the upper level, it was also time to repeat the steps for the machicolations on the middle tower to finish it off. The final push of the “stones” commenced, wrapping the middle tower surface all the way to the top and adding the trap door.

It’s important to note that I did not make the middle tower removable like the lower. The interior sections of the lower tower showed me that actually getting my hands into an even smaller diameter was going to be a problem. On the lower sections it was barely possible, and I wasn’t looking forward to that again. At that point I made the executive decision to skip it.

Next up was the base. The base was nothing more than cut R4 residential foam (which can be found at a home improvement store) with a depression hollowed out for the tower to sit in. That got to be quite messy with cutting and sanding to get it to fit right. In the end, like the middle tower, it required a few shims here and there for it to set level. This did not matter too much as I knew they would be covered up when I added the gravel to the base. The base was set with copious amounts of white glue and left to dry overnight.

The next night I scored the base in several sections and used white glue to attach the stone gravel and let that sit overnight.

Painting

When it finally came time to start painting, the weather does what it always does around here: turns the humidity up to 11. We all know what that means — no spray paint. But as I was contemplating that, I knew it would have to be primed by hand anyway. Spray paint and cardboard don’t usually adhere well. As it was, a solid evening ended up being devoted to priming the tower black. I needed two coats in most places as the “shiny side” of the thin cardboard needed to be facing out (the inner side is too rough and too porous, which would cause warping).

Once primed, the first step was to dry brush the tower gray. Now it might seem like the more straightforward thing to do is simply coat the whole thing gray. While that can be done, it also wasn’t what I was going for. Painting structures like this uniformly gray makes castles/towers look "cartoonish" in my opinion. I wanted the dark shades to come through.

After the initial color, next up was lightly dry brushing straight white onto the surface. This was done very lightly for highlights and not to turn it white. After the white came something that might seem unusual for a color, but something I did with the Empire Castle: a dry brush of a lighter orange. This might seem odd, but what it does is make the rock seem more realistic, especially with what I knew I’d be doing in the final painting step. I went from the base on up to the removable tower top. Once done I did notice the upper level was too "orangish," but no matter.

Why I didn’t worry about “too much orange” was because of the last step in painting the tower: a light wash of black. To achieve this a mix of a very watery black wash was all that was needed. In most cases water and cardboard do not mix; warping can occur. But because I sealed it off with two undercoats I was fairly certain it would hold up well. Rather than simply dousing it with the watery paint, it was applied via brush with broad strokes to cover all the surface areas. I actually did three passes in total to get the coverage desired, letting it fully dry between passes. What this achieved was a surface that looked like natural field stone, the kind that was likely being used as a building component for the small keep being constructed in Hommlet, of which the Guard Tower is part.

The final part for the tower proper was the creation of the stone steps. Through some trial and error I got the foam “stones” to sit right for the most part and it was a simple matter of cutting, sanding, and gluing everything to get to its final shape. The painting process was the same as for the exterior of the tower itself.

Yet to Complete

At the time of posting this the second interior level is fully constructed, removable, and primed but not yet fully painted. I’ll add a followup post to this one when it’s complete. Also, the shield above the gatehouse likewise needs to be finished with the coat of arms of Hommlet.

Closing thoughts

In all I’m pleased with how it came out and it was a fun project to work on in the man cave. There are a few minor mistake areas, but not enough that people would notice unless looking really hard (one section of the battlements has a wider gap than I had anticipated and one arrow slit alignment issue).

One happy accident was the area of the placement for the catapults. I hadn’t set out with placing the engines there but imagine my surprise when the plastic ones from Wizkids just fit inside. Even better was the fact that I got four of them from the local gaming store reduction bin for something like a total of $10. I was originally going to create them out of balsa wood but this saved me time.

Another happy accident? Rufus the fighter who inhabits the tower? I was able to represent him with one of my Ral Partha miniatures which is actually one of the oldest minis I have in my collection. He was not mine originally but got passed down to me when my older brother stopped playing AD&D. There is something cool about the axe-wielding mini from the early 80s paired with the recently completed tower.

Overall, I hope when it’s needed in the campaign it will be a “big reveal” moment and the players will appreciate it. I’m not saying too much just yet as one of my players follows my blog. If nothing else

Completed 28mm Hommlet Guard Tower terrain piece with battlements, steps, and catapults for Greyhawk campaign
The finished Guardhouse!

then at least I got to share it with the wider gaming community.

I’m also pleased that in the end I decided against recreating the Moathouse itself. Others have already done it and done it quite well; no need to revisit. In a way it adds to the overall story of folks creating terrain for T1 – The Village of Hommlet… Does this now mean I need to make the Church of Saint Cuthbert too, or the Inn of the Welcome Wench?

One final note: as I’ve done plenty of these projects, one thing that always surprises me every time is the amount of waste material these things generate from all the cutting and sawing. It behooves you, at minimum, if attempting a project like this to clean up at least every night or it gets messy fast. This build I was very disciplined — after finishing each major section I had the hand broom out sweeping and was using the shop vac regularly. The sanding and cutting of the base was even more so. Trust me, your hobby area will thank you for the diligence.

For reference as completed: the tower is about 19½ inches tall, 13 inches wide, and 13 inches in depth.

There you have it — the Guard Tower of Rufus and Burne from TSR’s T1 - The Village of Hommlet.

As I noted about the Empire Fortress project above, that project really was using leftover parts from my abortive attempt to create Castle Von Wittgenstein from the Enemy Within campaign for Warhammer Fantasy Role-Play. I stopped that project because of the sheer size and scale along with the limited utility of it. The part I reused was what became the gatehouse. I’ll be posting about that in the not too distant future. It’s also ironic that project was inspired by the Moathouse too.

What are your thoughts on the project or the Village of Hommlet in general? 

End note: as I noted about the Empire Fortress project above. The project really was using leftover parts from my abortive attempt to create Castle Von Wittgenstein from the Enemy Within campaign for Warhammer Fantasy Role-Play. I stopped that project because of the sheer size and scale along with the limited utility of it. The part I reused was what became the gatehouse. I’ll be posting about that in the not too distant future. Its also ironic that project was inspired by the Moathouse too. 

Monday, March 1, 2021

A Dark Ages Fortification

Just like the fortifications of Normandy at the end of the Dark Ages, a fortress in the mold of robber knights looms from the forests in the World of Warhammer (more on that below). But indeed a wooden palisade filled with mossy beams and wooden stakes to ward off would-be attackers and a fortification of an earlier time...

Spiky! just for an attackers benefit that is.

I know I said in a post in December that the next castle I create will be something akin to the Warhammer Mighty Fortress from days of old. While that is still true, I also decided to finish this up from its start nearly one year ago.

The fort you now see started out as nothing more than me noodling around with my glue gun, x-acto knife and a bunch of sticks whittled to points to represent a palisade. I really had no other plans than testing it out and trying a few things with the Sculpey modeling clay to see how it might set after being baked in the oven. Nothing spectacular were the results and it sat for a bit.

Then for some reason I started adding more and more and constructed the gatehouse which was the most time consuming and the towers with the basis of them being 1/2 gallon milk cartons. From there I continued to add as it came into my mind and based on a motte and baileyconstruction type of Dark Ages fort.

Got to have a side view.
After the first wall which was nothing more than the initial twigs sharpened and glued I realized that due to the curves of the sticks I would need to double it up, so the second row was added. From there it was a simple matter to glue in the supports for the walkway and cut the sticks to fit and then length wise generating two pieces each to glue to the platforms. The base against the bottom of the walls switched from the aforementioned clay to the R4 foam. After that it was a simple matter to glue down the rocks and sticks and add the wooden stakes. I say simple but to be honest it was very time consuming.

The towers were constructed much the same and as I noted above from 1/2 gallon milk cartons that I cut down to the correct size. Once it was the right size I added the bass wood to each corner and glued it down to the base. From there it was just adding the horizontal parts and a heck of a lot of Popsicle (craft sticks) cut down to size, round ends snipped off and sanded. I came up with the idea of the beams jutting out after I had completed the tower construction so unfortunately I had to cut, sand and glue each one individually. That was almost as time consuming as whittling the palisade walls.

The gatehouse was probably the most complex part of this project. The roof is removable and was designed that way from the start. The bigger issue was the frame that it sits on seemed to fight me every step of the way. Eventually through trial and error I got it to work out. I also had to add a heck of a lot more reinforcement to the beams than I thought I might need. It also required a lot more bass wood to build it correctly. Like the towers, I did not think of the jutting over-beams until after it was finished.

No easy ways in here.

The last part that was constructed was the central tower. Here I really goofed and did not make the wall on the motte wide enough as it were. For a while I was using a tower that was based off of a Shackleton Scotch box. In the end that was just too wide. So I used a liquid egg carton instead which has a smaller footprint to it. Even this presented a challenge as the carton was a bit too short. So all I did in the end was grab another one and added it to the first to get the requisite height.

For which gaming system you might ask? Well it could be for almost any really. Seeing as I play Warhammer I will most likely use the rules from Warhammer Historical: Shieldwall, The Age of Arthur, Fall of the West or even Siege and Conquest. Hell I suspect even Warhammer Siege should "work". One other thought is...SAGA which I will freely admit I don't know much about.

For those interested here is the materials list for what you see to make this, all common items one probably already has lying around the painting/gaming area if you are like me.

  • Gatehouse with the roof off.
    masking tape
  • white glue
  • super glue
  • hot glue (from a glue gun)
  • cardboard
  • poster board
  • foamcore board
  • 1/2 milk cartons
  • Shackleton Scotch cardboard boxes (helps with the progress...)
  • toothpicks
  • balsa wood
  • bass wood
  • It disassembles for (somewhat) easier transport.
    R4 residential foam (Home Depot sells it in 2x2 squares)
  • Popsicle sticks
  • rocks
  • stones
  • twigs (lots of cutting with the x-acto here, you'll need a fair number of blades!) 
  • wall spackle (for covering up holes)
  • circular wooden pieces for the shields
  • paint
  • brown (earth) flock
  • green flock
  • static grass
  • escutcheon pins (for the main gate)

That is all it really is, nothing too crazy for when one is creating terrain and simple to do. Really what it is about is time and perseverance. Any big terrain piece like a castle will take months to complete if you want it done well.

After I took the photos I realized I still needed to add the wooden shields to the rearward towers and the main tower. They are glued now, just need to prime and paint them.

The main tower
 Overall I am pleased with it and through the painting the wood is a bit lighter than I envisioned and I have been toying with the idea of a mid-brown wash on it to dull down some of the brightness but am still not sure I want to go that route.

UPDATE: Since I created this post I have applied one brown wash to the whole structure but a few of the towers need a second coat of wash.

For paints it is really nothing more than: dark brown, medium brown, light brown, black ink, off white (called sandstone) for the lighter sections, blue for the windows and a light brown wash for the light parts to make it look a bit dirty and "lived in."

Future plans include finishing the court-yard and some suitably Dark Ages type buildings.


Sunday, January 13, 2019

Yo Ho, Yo Ho the Pirates Life for me!


In early December of last year we returned from Disney for vacation. We have been going there quite regularly since 2011. But what does that have to do with the focus of this blog I hear you say. Well as you know I am a fairly keen terrain builder. So when I was at Disney with the family this last time I spent a bit more time looking around and taking in the architecture. As one would imagine I am a big fan of the prototype model of EPCOT (Walt's original idea). I also look over Frontierland a lot too as I like westerns as I have outlined on the blog here various times.

But to the point of this post: while riding Pirates of the Caribbean several times I paid more attention to something I have only given a scant thought previously: the skull rock at the very beginning of the ride. The skull is pretty cool and is fully detailed here. I will not go into too much detail as that site does a very good job going into detail but I will cover the basics.

The rock when viewed face on looks like a skull which is pretty cool. As the site listed above notes when you are on the ride, you glance at it and then your attention is drawn to the beach scene just beyond. But the thing is the skull is not a solid piece, it is a 3D sculpture.

So when we went through I really took notice of it and when we got back I searched out the site above and from my own recollection. I decided to recreate the skull as a terrain piece for Warhammer Fantasy Battle. I do not normally show Work In Progress (WIP) pieces, but this has come out very cool thus far. Like the sculpture it is based on, from the side the skull disappears and becomes just a pile of rocks. But when viewed head on it appears as a skull.


As you can see as it turns the skull "disappears." Basically, the structure is five rows of foam carved with the x-acto knife to create the effect of the skull.

Materials List

  • White glue
  • R4 residential foam-siding
  • X-acto knife.
  • Sand paper
  • Masking tape and cardboard for the base. Although one section is press-board before I realized I had to make the base larger.
  • Some white plaster Spackle to fill in gaps in the foam pieces and sanded.
  • Black, dark gray, light gray and white acrylic paint (do not use spray paint as it melts foam).

The plan for this piece is to create a small section of water to go around it so the skull will represent a small lake on the Warhammer board. In a way this is similar to the moat I am working on for my Nippon castle (albeit on an on-again off-again fashion)...

Special thanks to Parkeology for the photos and the break down of the construction. While it is not exactly as I remember it and I had to modify to create what I remembered it is about the only photo I could find.


Sunday, October 7, 2018

Oh Yeah, that other area of Wargaming- Terrain

(Grrrrrr.... Once again my love/hate relationship with Blogger continues as this hosting platform ate a large portions of my changes to this post and for whatever reason auto-save did not work....)

As summer turns to early Fall here in North America I take a pause from my intensive construction of my Warhammer Nippon Castle and the start of Castle Von Wittgenstein. (as well as numerous Warhammer Fantasy Battle units for various armies) I got to thinking about the overall amount of time that I and I suspect others engage in when it comes to terrain. It is my contention that there probably isn't as much compared to actual painting and assembly of miniatures which is to be expected.This in a way is a sad thing because one of the most rewarding areas of the game in my mind and in way one of the cheapest is terrain. Certainly when one considers the cost of Oldhammer; i.e that almost any miniatures have to be purchased off of eBay and not so nice prices, terrain is cheap in comparison.

When I say lack of terrain, I'm not saying there was none in our games, but rather a decided lack of attention to it  to a large degree. By this I mean buildings, forests/woods, rivers etc,were present, but not large scale projects I mentioned above. Even back in the day when 3rd Edition was the current edition of the game, I don't recall creating as much terrain compared to the gold standard of what we saw in White White Dwarf. Sure, in my gaming group we had the main board (cut into 12x12 sections for ease of transport), some trees, hedges and fences but not much else. Buildings were taken care of by the Warhammer Townscape book, but none of us attempted to create more elaborate pieces.
As an aside: over time I purchased another Warhammer Townscapes Book years ago and since I inherited our old terrain as a gaming group I reckon I have about 1.5 sets of buildings from the two books. I say 1.5 because despite this I don't have all of the buildings due to various moves and some being destroyed over said time-frame.For those not in the know, Warhammer Townscape was a book of card-stock buildings that one folded and glued, looking like this =>

For me the lack of terrain is odd when you consider the totality of the hobby. Even though I saw some of the excellent buildings created by Dave Andrews in various White Dwarf articles, it wasn't until after the heyday of 3rd that I really started constructing my own buildings. But a funny thing happened when I did I start creating them, I did so in a style very akin to 3rd Edition. This is probably not as "funny" when I think about it, for example (Willmark's Homemade Warhammer terrain)

Now, I posted these years ago on Chaos Dwarfs Online and are a slection of some of my terrain and the the style is distinctive, atat the same time familiar. But even with these I still wasn't doing anything too new, as a lot of the pieces were right from White Dwarf (not that its a bad thing).

I guess when you put it all together, terrain is one of the most under represented parts of the hobby (to a degree) but one of the most universally praised? Or put another way, gamers love terrain, but usually the last thing created. This in and of itself is surprising for another reason when one considers terrain is actually one of the cheaper areas of the hobby.


Saturday, November 11, 2017

Building My Nippon Castle for Warhammer Part I – A Long-Term Terrain Project

Hello all — Been a bit busy of late, but I’ve been working hard on Warhammer terrain. Case in point: over at Dogs of War Online, work on my Nippon Army continues. Or more accurately, work on my Nippon Castle continues.

At this point I’m so far into it that I can’t really stop (nor do I want to!). But I’ve also come to realize that it probably would have been cheaper to just buy some already-made terrain from various outlets online.

But therein lies my main argument against that: I work on the castle when I want to, at my own pace, and I’m having a lot of fun doing it. It’s relaxing and something completely away from technology — which I get plenty of Monday through Friday working in IT.

I originally started on the castle back in Spring 2013 and I’ve worked on it in fits and spurts ever since. About a month ago I picked it back up and have been diligently chipping away at it.

Here is where it stood around that time frame: 


What really kicked things into gear was taking a step back and starting on the outer walls, which are admittedly inspired by the walls from Siege & Conquest in the Warhammer Historical range. Strange as it sounds, that’s what spurred me on. I then went back and fixed some flaws in the main structure, and it keeps getting better and better.

Of course, here are some photos (this morning I started working on more of the roofs for the outer walls).

Here is where it stands as of about a week ago:


Here is where it stands as of a last night after about one week week of work between the photos. It may not look like much but I spent a lot of time fixing the roofs of the castle and strengthening the whole roof structure as well.

Thursday, January 28, 2010

Definition of Insanity – Starting the Darkside Blog (2010)

Willmark's Darkside Blog header logo – Oldhammer, Warhammer, and RPG content by Mark Harter
 As if I do not have enough to do I figured I would actually use my blog space that I created nearly two years ago! 

The blog will mainly focus on the comings and goings of my websites that I am either an Admin or Co-Admin for: www.chaos-dwarfs.com and www.dogsofwaronline.com; plus my work on the Word of Hashut ezine. Gold and Glory the ezine of Dogs of War Online may figure into here as well.

So be sure to stop back as I get this up and running.

Also, some non-Warhammer related items may appear here from time to time.

Onwards!

(EDIT: as of 7-7-26, Chaos Dwarfs Online can be found here and Dogs of War Online found here.)