Search This Blog

Showing posts with label AD&D. Show all posts

Wednesday, August 19, 2026

Dungeon Magazine #10- Threshold of Evil – Old School AD&D Thoughts and a Review

Dungeon Magazine #10 from the 1st Edition

Dungeon Magazine #10- Threshold of Evil
by Scott Bennie
An adventure for 5-8 PCs, levels 14-18

The adventure that is the subject of this review is right there on the cover of the issue itself—and it’s a cool cover at that. With Dungeon #10 you might very well have one of the best issues of the magazine in terms of 1st Edition (or even 2nd Edition) adventures. All of the scenarios are excellent, with the possible exception of Monsterquest, but I digress.

Threshold of Evil is one of the best, if not the best, 1st Edition modules presented in the hallowed halls of Dungeon. In my mind it ranks right up there with Into the Fire, Wards of Witching Ways, and Trouble at Grog’s as some of the finest 1st Edition Dungeon adventures. Did I mention just how good it is?

On a personal note, Issue #10 was one of the first “back issues” of Dungeon I ever procured, and one of the first 1st Edition ones I got. I was fortunate to pick this one up when I did; it helped propel me along the path toward the full #1–81 Dungeon collection.

Overview Threshold of Evil is no cakewalk, as the suggested levels indicate. It can be played a number of different ways, and it would be interesting as a one-off just to see how different groups of characters handle the challenge. Levels 14+ is no joke, this thing can be lethal.

At 22 pages it is sufficient for many sessions of play. The maps are clear and concise, and the artwork by Daniel Horne fits the mood perfectly. The only piece of art I don’t care for is the one on page 43 that starts the adventure; from there it’s excellent. The art always struck me as evocative of Games Workshop’s Warhammer Fantasy Role-play 1st Edition style.

The Setup The heart of the module is the standard “there is a problem and we need the PCs to solve it.” The twist is that the signs are confusing and no one has any real idea why strange things are happening. The villagers (the village can be any one of your own devising) point toward Mt. Thalask and the Arch-Mage Azurax Silverhawk, who has not been seen in some 200 years. That’s a bit strange, but Magic-Users are a peculiar lot, are they not?

A bit railroady? Sure. But you take Arch-Mages where you find them and hope they’re in a good mood. Plus, don’t Arch-Mages always get blamed when something goes wrong in their neighborhood?

The module begins as a reconnaissance mission. With the judicious use of spells that characters of this level will almost certainly have access to, the party can gain solid insight into what they might encounter. There is also a scholar by the unfortunate name of Hheltus who can shed some light on Azurax’s character (or lack thereof). Through spells or the scholar, the PCs are likely to form a picture that Azurax is not a particularly nice guy...and they are right, up to a point. Rather than being rabid, frothing evil, Azurax is far more nuanced. His research into extending his life is what has been causing the problems in the countryside, specifically his Portrait of Longevity.

The Approach Once the mission is defined, it’s time to supply up and head for Mt. Thalask. There is one major problem: his lair sits atop a 12,000-foot mountain. To make matters worse, Azurax has shut off the "easy" methods of travel: no fly, no teleport, no shadow walk, etc. The only way is up the mountain the hard way: climbing. So time to bust out that copy of the Wilderness Survival Guide!

At the summit the PCs encounter a tower, but it’s only a façade containing the first Simulacrum. This fight is relatively easy and serves mainly to make the party a bit cocky.

Inside the Complex Once the complex is breached, the real adventure begins. The living spaces on the upper levels are strangely devoid of monsters and traps. This is also where the party first meets Florimel (or rather, a Simulacrum of her) and can gain a bit of knowledge.

Descending deeper, things heat up. Level 2 contains more living areas packed with interesting details and yet another Simulacrum (this time of Lord Fell). Level 3 is where the first major battle can take place, or not, depending on the actions of the PCs. Slaadi and the most powerful simulacrums of Azurax and Lord Fell await here, along with the portals.

Level 4 brings more living spaces and a chance to meet the real Florimel and learn of her plight. From there the throne room becomes accessible, offering the possibility of parley with the real Azurax and a host of his (and Lord Fell’s) simulacrums.

From this point the module can go in any number of directions. I’ll leave the possible outcomes out of this review to preserve some suspense.

Strengths This could easily become a slug-fest, but it doesn’t have to. Everything depends on how the players approach the situation. Remember: Azurax is not (yet) truly evil. He is more of an “ends justify the means” type. The PCs could have real problems if they simply waltz in and start slaughtering the occupants, after all, what hard proof do they really have beyond the misgivings of a crusty old sage?

The portals are excellent. Who doesn’t love a good series of one-way magical portals? If one player goes through (and it usually happens sooner or later), the rest eventually follow. These portals make fantastic hooks for alternate campaign worlds—or dramatic ways to end a campaign.

The use of Florimel is another strong point. An enterprising DM could build an entire campaign around the events on Azurax’s mountain and her eventual return to the Faerie Realm. (For those unfamiliar, pick up Edmund Spenser’s The Faerie Queene, as noted in the adventure itself.)

The creative use of the simulacrum spell is brilliant. Before this module I had never really considered using it multiple times. After reading Threshold of Evil, I never looked at the spell the same way again. It lets the designer put some of the toughest possible foes (classed NPCs) in front of the party without the risk of the PCs walking away with a mountain of magic items. The same technique is applied not only to Azurax but to Lord Fell and Florimel as well.

Azurax looks to be a tad grumpy here...

Azurax himself is loaded with potential. If thwarted, he makes an excellent recurring villain. Best of all, he is not the tired “rabid world-conquering mad mage” trope. He has little interest in ruling the world and is far more focused on himself.

The Portrait of Longevity is a great hook with a slightly Renaissance flavor that may feel a bit disjointed in a strictly High Medieval setting, but it works well here. I especially like how Azurax disguises the true portrait among many others of himself.

The inclusion of Slaadi is another plus. Some people bag on the Fiend Folio, but not me. These guys are cool, and because they are not evil, some of the party’s usual defenses may not be at full strength.

Finally, the use of Wish and Phase Door to seal off easy access shows real thought. The party will burn through resources with no convenient place to rest and recuperate.

Weaknesses There are a few areas where a total party kill is dangerously easy, most notably the confrontation in the throne room. Even a savvy, experienced group of high-level characters can get caught flat-footed here. DMs should be prepared.

If the party defeats Azurax through pure force, the magical loot can become excessive. In practice this is unlikely if Azurax is played intelligently; he is far too smart to let that happen easily.

One minor nitpick that has always nagged me: the living spaces feel a bit small for a complex perched 12,000 feet up a mountain. Boredom alone might have done in some of the human occupants long before the PCs arrived. It’s a small point, but it’s there.

Closing Thoughts I really had to stretch to find even those few weaknesses. This magazine is well worth seeking out for this adventure alone. It can serve as a springboard for multiple alternate campaigns, further high-level adventures, deadly consequences, and a memorable high-level antagonist. You can’t really ask for much more than that.

Is there anything I missed? Have you or your group ever played Threshold of Evil? I’d love to hear your thoughts.

The original review can be found here on Dragonsfoot.

Friday, August 14, 2026

The Place Where It All Happened: My Hometown, the ’80s Hobby Scene, and the Luck of Location


I wrote about THE CAMPAIGN back in 2014: that first long, magical AD&D run that still feels like the zenith of my gaming life. About how things changed afterwards as mirrored by Stranger Things and Growing Up in the 80s.

But there’s another piece of that story I’ve been turning over lately. It’s not just when it happened. It’s where.

Rochester, New York in the 1980s wasn’t New York City. It wasn’t the Twin Cities or Chicago. It was a mid-sized industrial city with big companies (Kodak, Xerox) that hadn’t yet collapsed, a couple of strong universities (U of R and RIT); and, for a brief, perfect window, a surprisingly deep hobby scene.

That location mattered more than I appreciated at the time.

The Narrow Window

I got my Moldvay Basic Set for Christmas 1982. I wasn’t in the absolute first wave of players, but I was close enough to catch the rising tide. By the time Warhammer Fantasy Battle 3rd edition arrived in my area in early 1988, my friends and I were right in the middle of high school, the perfect age for that kind of deep, obsessive hobby dive.

The window for pre-4th edition Warhammer in the US was tiny. Maybe three and a half years. GW’s management buyout in late 1991 was already pushing things toward 4th edition. We hit the sweet spot dead center.

Change any of those variables and the whole experience changes. Born a couple years earlier and it might have been too soon, the scene wasn’t there yet. Born later and we would have only known 4th edition and beyond. But my position in my generational cohort put me exactly where I needed to be.

Why Rochester Mattered

Not every town had this. Places like say Kansas or smaller rural areas often had one (maybe) game store, if they were lucky. Rochester had 3–5 active stores at points in the late ’80s. The industrial base that hadn’t yet hollowed out, plus the colleges, created enough of a critical mass of nerds, engineers, and creative types to sustain a real hobby infrastructure.

It wasn’t a huge leap from Lake Geneva for TSR stuff, and the Games Workshop distribution pipeline reached us reasonably well in those early days. That combination: decent distribution + local density, was rarer than it felt at the time. We just didn't know it.

By the mid-’90s the scene had contracted. Crazy Egor’s (I actually know Egor/Paul; he lived my home town) became Millennium Games. A couple of other stores hung on for a time, but for a stretch it was spotty. The golden window had closed.

The Ghost of Place

Rereading my earlier posts about THE CAMPAIGN and the Citadel Giant saga, I keep coming back to how much location shaped what we got to experience. The same way the show Stranger Things uses Hawkins as more than just a backdrop, it’s part of the feeling; Rochester was part of ours.

We didn’t have the monster-of-the-week drama. We had basement tables, multiple stores to browse on weekends, friends who were all hitting that same perfect age at the same time, and a brief era when Warhammer 3rd edition felt like the center of the universe.

It wasn’t perfect. It was rough around the edges, like most real memories. But it was ours.

And like the friendships that formed around those tables, some of it faded as people moved on with life. But the place where it happened? That still feels special. I ended up back in my hometown, the same place where so much of it started. The man cave is here. The dogs are here. The memories are here.

Sometimes the luck isn’t just in the timing. It’s in the coordinates.

The Ghost of the ’80s didn’t just haunt the games we played. It haunted the town where we played them.

How about you? If you are around my age (smack dab in the middle of Gen X) does this sound familiar? 


Tuesday, August 11, 2026

Dungeon Magazine #46- Iron Orb of the Duergar – Old School AD&D Thoughts and a Review

Dungeon Magazine #46 Cover

Dungeon Magazine #46 - Iron Orb of the Duergar
by Peter Aberg
An adventure for 6-8 PCs, levels 11-15

Tipping the scales at 22 pages Iron Orb of the Duergar is one of the best modules in any edition hands down. In fact I would say this module can hold its own with any of the classic modules as well. Dungeon #46 is a seminal product for me as it is the second Dungeon Magazine that I personally bought and it leaps off the pages on first read.

Iron Orb of the Duergar is generic enough that it can easily be set in any cold mountains region without much difficulty and has a nice Norse/barbarian feel to it. In fact the author suggests Icewind Dale for the Forgotten Realms or the Archbarony of Ratik for the World of Greyhawk; for my campaign world it was a snap.

This module is fairly straightforward and has lots of combat! There is some nice back story to it however and the whole feel is one of a more regional/kingdom level feel to it rather than adventuring at the local dungeon a few miles away from town.

The module centers on northmen raids... or so it seems. True, barbarian raiders are striking the southern kingdoms, but not as it seems. Reason being? The Iron Orb of the Duergar; a powerful artifact that has gotten itself attached to Ulmvard the High Priest of Odin. Normally such a figure might be able to cope, however the malignant orb has the powers of a beholder and duergar!

The adventure starts out assuming that the PCs are perhaps local rulers of some of the more southern lands (they might be considering level of play for this module) or contacted by such. They head out across the sea towards the Northmen's lands to investigate. Once the PCs arrive on scene they find out that Ulmavard has switched focus to now is planning on attacking the local dwarfs instead of raiding cities to the south. This is a bit odd given the fact that all of the summer months have been focused on raiding the south... a clever PC will pick up on why is this man talking about making war on dwarfs?

Ulmvard the High Priest of Odin by Mark Nelson
Ulmvard the High Priest of Odin is a bit...unhinged

Having to enter the city clandestinely the PCs will make their way to an inn (they always do). From there they eventually fall into the camp opposing the slightly unhinged High Priest of Odin. Enter the High Priest's daughter Anja who fills in the holes for the PCs. A group plans to seize the Orb realizing that Ulmvard is not himself. It just so happens that the Orb can scry and all too soon the PCs need to flee the city and head towards the mountains. Here is where things start to get good.

The mine is old that was once abandoned, but is now run by Norse guards (some frost giants) and slave labor (garnered from the raids of the PCs homelands) at the behest of Ulmvard. The upper levels are logical and well mapped and the descriptions give a great feel to it. The random encounters are perfect and quick thinking PCs will notice there is more than meets the eye here.

The whole point of the upper level culminates with the revelation that the PCs are not the only ones interested in the operations here and those of Ulmvard. The drow make an appearance and it is not the usual setup! They propose a temporary alliance which is a nice break from the fight them at a drop of a hat mentality... The dark elves have no desire to see their enemies assemble the Iron Warrior either. Make no mistake the dark elves are not friends of the PCs, but it is the old "the enemies of my enemy is my friend". Depending on the race/class makeup of the PCs it will be interesting to see what the more lawful/good types in a party might think about working with dark elves. Either way they do not accompany the group during the adventure and are off quickly.

The ruins of the duergar citadel are awesome, the first time I read this I imagined it quite vividly and the author did a great job with the descriptions, they really seem to come to life. It really captures a feeling and you can imagine the historical perspective of it. I especially liked the ruined nature of side corridors to get around the original collapsed sections, it really lends an authentic air to it. The way to get to the other side is imaginative as well and presents some great combat opportunities as well as real and present danger: falling into lava will ruin your day. The author also provides little back story snippets as to why the ruins is the way it is now, and ones that can easily be added to a campaign.

Once to the other side, the potential for large sweeping, knock down, drag em out fight(s) is right there. The rest of the ruins can become one massive battle if the PCs are not careful in their approach to tactics. There are plenty of duergar and being dwarfs they do not fight stupidly.

After breaching the upper level the forge level awaits! There is some nice flavor text here to add even more visual appeal, one can almost imagine the dwarfs sealing up and mounting the great doors after they defeated the duergar in ages past. Again there are little back story snippets that tell the DM why things are the way they are now and possibly lead to further adventures.

The riddle is a nice touch for proceeding northwards as well, if a bit easy to solve.

The final fight can go either way and the drow party makes a nice option for the DM should he need reinforcements for the PCs. Conversely if they treated the drow with the unusual reaction the drow might turn on a weakened party at the very end while they themselves hang back and let the two factions slug it out in the main fight.

Everything hinges on this fight, and the PCs need to triumph or they are in for it.

Strengths

The first strength of the module is its level requirements. All too often it is tough to challenge high level parties. If the party does not stop the plans of Ulmvard in time they are going to have a BIG problem on their hands, and I mean big ;) If this happens the PCs might want to run...

Another thing that makes this module work so well is the use of duergar as the movers and shakers along with Ulmvard. I am hard pressed to think about where there have been other modules that feature duergar this prominently. It would have been even better with derro, but I digress! ;)

The atmosphere leaps off the page from the human cities to especially the duergar ruins. The artwork of the module really lends its support as well.

The dark elves are a nice touch and create some great moral dilemmas for some of the PCs depending on the group.

The orb itself is a great item and a great way to rally lead the PCs on, especially if one of them is foolish enough to use it. The fact that it is an artifact that cannot easily be destroyed only adds to this.

This module begs for follow up. Especially if the PCs are successful in thwarting the machinations of Ulmvard! So they defeated him and stopped him from placing the orb. Now what? The Orb needs to be destroyed and it is not an easy task to do. This would be a great followup here. Plus it is entirely up to the DM as to just how this should happen or can it even be done?

Weaknesses

To be honest there are very few here and for the most part it is me being nit-picky and all are easily solved. In fact as I note depending on your campaign some of these might not even be weaknesses.

One thing that comes to mind is the weakness of having Ulmvard's daughter play the role of the guy in the tavern with the mission.. it is a minor point, but one to consider. Someone had to get the information to the PCs. The later issue revolving around her is not that dramatic as the PCs may be unimpressed with the state she is in later, or at least not highly motivated to help an NPC they only just met...

The only big consideration that I thought of on rereading it is that the premise of why the PCs are here and what are their rewards for doing so? The DM needs to take special care here to make sure that the PCs want to go on this adventure. This should not be an issue for an experienced DM as by the time they are 11-15 level the PCs have bigger concerns than getting X amount of gold for a mission... In fact being so open ended might be a boon as the DM can use this to tailor fit it to his campaign.

There is a boatload of monetary wealth here (area 36), but it is unlikely to go to the PCs, not even a fraction of it. Fortunately the author gives some flavor text as to who it actually belongs to, so this creates some nice adventure hooks as to what the PCs do with it. Any PCs of the lawful or good sides of alignment will be hard pressed to keep it as it is readily apparent that this is not the Northmen or duergar loot. Tying into this thought is that the PCs will get some monetary treasure out of this adventure, but very little in the way of magic items. This may be a plus in your campaign, however in my opinion for the level, it is a bit too skimpy. The XP award is right on however for such an epic undertaking.

In conclusion this is in my opinion a gem of a module and the top of the heap for second edition (or very near it). It acquits itself well and is well worth playing. I have left some sections generic and did not go into too much detail as I will be using this module down the line in my current campaign and give away too much.

So for those that have this or have played it, what are your thoughts?

NOTE: Link to the original review can be found here on dragonsfoot.org 

Tuesday, August 4, 2026

1st Edition AD&D Dragon Assault: When Cats Save the Day


Dragons and cats in a melee in a medieval city

A recent thread on RPG Pub caught my attention, dealing with dragons and defending a settlement in a quasi medieval world from winged death on wings.

What got me thinking was the type of dragon assaulting the city and in what game system matters a lot. A REAL lot.Also, what type of breath weapon does the dragon have? Traditional fire and smoke of the concussive, napalm nuclear stuff of Game of Thrones/House of the Dragon?

As AD&D is the focus of a lot of the older players gaming sites I decided to ponder it from a 1st Edition AD&D perspective. 

Personally, defensive fortifications is something of an obsession for me over the decades in 1st Edition ADD. And after all these years? Its a LOT of work from magic, to underground races to yes, flying creatures assaulting the battlements. 

Three helpful Dragon magazines on the subject are:

  • Dragon #145 - Theme "A Knight's home is his castle"
  • Dragon #160 - Theme "Who stalk the streets, are stalked as well"
  • Dragon #224 -  Theme "Fantastic Architecture"

In short, because there are high number of monsters in the game system, magic items and spells that allow for ease of assault, the means for defense has to be likewise high. 

So with all this in mind there was there I looked at page and it hit me, read on.

First Post

Willmark posted: Oh and one thing just caught my eye, if we go rules as written in 1st edition AD&D? Read closely page 29 for dragon ages in the Monster Manual. The DM rolls a single die on number appearing. You could get anything from age 1 (Young) to age 8 (Ancient)! Equal chances for each one.

Of course this in an of itself could be really amusing: "Guards man the ramparts! Summon the mages to their positions and draw the ballista and await my command to fire!

Baby dragon comes winging in... Captain of the Guard "Uhhhhhhh…”

Now sure the DM can adjust this so Smaug's grand kids doesn't come winging in looking for a snack and ending up as a juicy turkey special at the local dive But the point remains, rules as written it could happen.

And if a hatchling does mange to wobble its way into the city? Forget the fact that even normal weaponry can hurt a dragon in 1st edition. Why even bother? Just send in that uber-bad-ass of low level monsters in 1st Edition: the domestic cat!

That's right, you read it right: the cat. You know, that monster that has more hit points that most first level magic users?

The domestic cat: No. Appearing: 2-12, AC:6, MV 5", Hit Dice: 1-5 hit point, Attacks 2, Damage 1-2/1-2 Special Attacks: rear claw rakes 1-2/1-2 

With that in mind consider the following.

Second Post

Willmark posted: Building on my thoughts and the wackiness of the random nature of dragon age under Rules As Written.

That very young eight hit point dragon that might show up? What if it meets the most terrifying monster in Monster Manual II? the domestic cat with two attacks plus possibly two more from the rear claws; number appearing of two to twelve. 

It just so happens there are ten of them in this scenario. Read on.

Part 1- The City is Alerted... Dragon Inbound!
The alarm sounded wildly across the walls as men scrambled to their posts throughout the vast city.

"Dragon sighted!" shouted the lookout, voice cracking just enough to be unhelpful. "Coming in low!"

The Captain of the Guard stormed up the ramparts, hand casually on his sword hilt as if he had done this many times before. "Man the ballista! Archers to the wall! Summon the mages…where in the hell are the mages?!"

A corporal instantly appeared (they always do at just the right time). "Sir! The mages are…indisposed."

The Captain narrowed his eyes. "Define exactly what indisposed means.'"

"They're at the Shady Gutter, sir. Something about arcane research and a drinking contest."

The Captain closed his eyes for a long, painful second while rubbing his temples . "Of course they are."

A distant screech echoed through the air. All heads turned skyward.

The dragon crested the horizon. All eyes squinting and straining to catch a glimpse of the fearsome beast on the way to lay waste to their city.

It was…small. VERY small.

The Captain blinked. "That's...IT?"

The lookout squinted. "Yes, sir. Very…enthusiastic, though."

The dragon gave a high pitched roar that sounded more like a kettle thinking about boiling.

A nearby soldier whispered, "I've seen bigger chickens."

"Quiet!" barked the Captain; he was in agreement, but couldn't show it to the rank and file.

The dragon swooped closer, wobbling slightly mid-flight, and let out a puff of flame that slightly singed a banner and immediately sputtered out.

A pause.

The Captain slowly turned to the corporal. "Where are the recruits…they need some…practice"

"Sir…they too are at the Shady Gutter..."

Another pause. Longer this time and the Captain shook his head. "Of course they are."

He stared at the approaching creature, then back at his men, then off toward the city.

"Very well," he said at last. "Stand down the ballista."

The corporal hesitated. "Sir?"

"You heard me. Stand. Them. Down."

The dragon attempted another roar and clipped a chimney. Its wobbly flight continued.

The Captain rubbed his temples again, a growing headache coming on. "Go into the city."

"Sir?"

"Find me…several…cats."

The corporal blinked. "Cats, sir?"

"Yes, corporal. Cats. Small, fast, angry, and sober. Unlike anyone currently in this garrison."

The corporal saluted slowly. "Yes, sir. Cats."

The dragon landed awkwardly in the square, claws scraping stone as it tried very hard to look imposing. It puffed itself up, wings flaring with all the confidence of something that had never been told "no," and let out another defiant roar.

It echoed.

It accomplished nothing.

A shutter creaked open somewhere above. An old woman leaned out, squinted, and shut it again.

Moments later, almost effortlessly a cat slinked around a statue nearby. It looked at the dragon. The dragon looked at the cat.

Then another cat appeared. A third, until several were now milling about.

The first cat finished with its paw and sat, tail wrapped neatly around its feet, regarding the dragon with a kind of detached curiosity usually reserved for mildly interesting furniture.

The Captain folded his arms, watching from the wall.

"Well," he muttered, "let's see how this plays out."

There was a brief flurry of motion, some indignant screeching, a few offended yowls, and a surprising amount of hissing.

Then silence.

The corporal returned, slightly out of breath. "Sir…target appears to be…neutralized."

The Captain nodded gravely. He peered down into the square, where three cats now lounged atop the dragon with supreme satisfaction "…commend the cats," he said.

The corporal leaned over the wall, then straightened. "Sir, they are ignoring me."

The Captain allowed himself the faintest smile. "Of course they are."

He turned back to his men.

"Stand down. And someone fetch the mages…and bring milk."

Part 2- The City is Defended...by...cats?

Meanwhile on the Ramparts...

The "battle" below had settled into something…difficult to categorize.

A few guards leaned over the parapet, watching with mild interest.

The Captain didn't look down.

"Odds?" he asked.

The quartermaster didn't hesitate. "Cats are two to one favorites, sir."

The Captain nodded once, as if this confirmed a long-held suspicion. He reached into his pouch, produced a leather purse with the unmistakable heavy clink of coin within, and slammed it onto the stone.

"Bet this month's wages on the cats. All in."

The corporal blinked. "Sir?"

The Captain didn't even look at him.

"You heard me."

Below, there was a brief, offended screech, followed by a chorus of hisses and the unmistakable sound of something losing very quickly.

The quartermaster leaned slightly, peering over the edge. "Movement suggests the cats are pressing their advantage, sir."

"Good," said the Captain calmly.

Another pause.

The corporal rubbed his forehead. "Sir…is this…standard protocol?"

The Captain folded his arms.

"It is now."

A beat.

From below? Silence.

The quartermaster straightened. "Outcome appears decided, sir."

The Captain allowed himself the faintest nod. "See?" he said. "Reliable assets."

The corporal sighed quietly, already imagining the paperwork, "…I'm going to need a new column on the duty roster."


Part 3- The "Triumph" at the Shady Gutter Tavern

The Shady Gutter tavern sagged under the weight of its own questionable life choices. Tankards lay overturned, a wizard snored face-down in a spell book, and two recruits were arguing with a chair that had, by all accounts, been winning for several hours.

It was, as usual, impossible to tell who was ahead.

The door slammed open.

The Captain of the Guard strode in, armor still dusty, expression carved from equal parts triumph and disbelief.

A mage lifted his head an inch. "Did we…win?"

The Captain paused.

"…Yes."

A recruit squinted. "Did we fire the ballista?"

"No."

"Archers?"

"No."

"Magic?"

The Captain glanced at the unconscious wizard drooling into his sleeve. "…not as such."

The tavern fell into a puzzled silence.

From behind him, the corporal stepped in more quietly, running the numbers in his head for tomorrow's roll call.

"Sir," he muttered, low enough that only the Captain could hear, "how would you like me to write this up?"

The Captain didn't even hesitate.

"Decisive action," he said. "Efficient use of local assets."

The corporal closed his eyes briefly. "Of course, sir."

Outside, in the square, the aftermath remained.

The dragon lay where it had fallen; a small, unimpressive thing that had arrived with grand intentions and departed as a footnote.

Draped across it, the cats rested in various states of satisfied indifference.

One blinked slowly at nothing in particular.

Another cleaned a paw with meticulous focus.

A third lay stretched along the flank, making full use of the lingering warmth while being quietly annoyed at its steady dissipation.

They looked, as they always did: mildly disappointed in the world, and vaguely pleased with themselves.

Back inside, the Captain raised a tankard.

"To the defense of the city!"

"To the defense!" came the ragged reply.

The corporal stared into his drink.

"…I'm putting them on the roster," he muttered.

A pause.

"…and requisitioning milk."

(The End)

Conclusion?

I'm not sure other than the system one is playing in makes all the difference in the world when once considers the age of question of a dragon assaulting a city. Granted I made an absurd story out of the whole thing but the point stands.

In A Lord of the Rings game, Smaug might show up. In 1st edition AD&D fluffy and his friends are wiping out a hatchling before noon.

1st Edition Warhammer Fantasy Role-play? Well...I'm not sure you could wake even wake it up. 

There you have it. What this illustrates is that "can a dragon lay waste to a city?" The smart answer is "maybe" because (RAW) Rules As Written? They can produce some amusing results.

 Let me know your thoughts. 

Saturday, August 1, 2026

A4- In the Dungeons of the Slave Lords – Old School AD&D Thoughts and a Review

A4 - In the Dungeons of the Slave Lords cover art

NOTE: Way back in 2011 I reviewed the entire Slavers series on Dragonsfoot. As I now improve my blog, I'm moving all my content from around the web to here. This is the second review in the A Series for AD&D.

A4 - In the Dungeons of the Slave Lords
By Lawrence Schick
An adventure for characters levels 4-7

Closing out the A-series is A4- In the Dungeons of the Slave Lords, written by Lawrence Schick. Like its predecessor, it comes in at 28 pages and sports a fantastic cover by Erol Otis.

Like the previous three modules, A4 is written by yet another author. Looking through the credits for the entire series, you see many of the same names, but everyone seems to have traded roles from one module to the next. Coupled with the fact that these adventures all began life as tournament modules, it helps explain why the series sometimes feels less cohesive than it could have been. That is not to say I enjoy it any less, but I do think it accounts for some of the inconsistencies.

After harrying the Slave Lords' operations throughout A1, A2, and A3, the player characters finally reach the moment of truth. Or rather, that moment has already passed. Stripped of their equipment, deprived of most of their spells, and dumped into the Slave Lords' dungeon, they now have to survive with little more than their wits. Even today that is a memorable opening. At the time, it had to be one of the most original adventure hooks TSR had published. The only comparable shock opener that comes to mind is Vecna Lives!

So there you are. No weapons. No armor. No light. Nothing except a spell scroll that you cannot immediately use because you cannot even read it.

Schick does a good job explaining how to run this unusual situation and how the lack of equipment should affect the players. Mapping becomes almost impossible, which fortunately is not a major issue since the dungeon itself is fairly compact. Because the module predates the Survival Guides and nonweapon proficiencies, some of the mechanics require a bit of hand waving. Running it with later AD&D rules smooths over a few rough edges, but also makes parts of the escape a little easier than originally intended.

Fortunately, the dungeon is littered with odds and ends that resourceful players can turn into makeshift equipment. Rusty daggers, bone clubs, and other scraps are hardly impressive, but they are better than bare hands.

The darkness itself creates an interesting challenge for the Dungeon Master. Without being able to rely on the players seeing a map, the DM has to carefully describe every turn, intersection, and direction of travel. It demands more attention than a typical dungeon.

One part I have never bought, however, is the explanation regarding infravision. According to the text, every part of the dungeon and every inhabitant is effectively the same temperature.

Riiiiight....

The dungeon inhabitants are varied enough to keep things interesting. There is a struggling kobold tribe, an unusually weak will-o-wisp, giant crayfish, giant crabs, cave fishers, and a peaceful colony of myconids who seem content to sit around singing "Kumbayah" in their fungus forest.

The kobolds deserve special mention. They are not much of a threat, but they add something often missing from early TSR dungeons, namely a sense of ecology. They have clearly been driven deeper underground and are slowly dying out, making the dungeon feel like a living place rather than simply a collection of monsters waiting in rooms.

Exactly which route the party takes through the dungeon depends largely on how they solve a handful of obstacles.

Area 19 is probably the easiest escape route, although getting there requires crossing the infamous twenty-foot chasm in Area 18. Players can either attempt a dangerous climb two hundred feet down and back up again or, as my group did years ago, steal the bridge from Area 8 after dealing with the giant ants.

Area 21 is probably the next best option, though the cave fishers make escaping that way a nerve-racking proposition. Three cave fishers firing at lightly equipped characters is no joke.

Area 10 is probably the hardest route since it requires an underwater swim. If memory serves, the expanded map in A1-4: Scourge of the Slave Lords makes this section much easier to understand.

Regardless of which exit the players choose, they emerge onto the island about halfway between the volcano and the docks. The underwater route places them closest to the harbor if they follow the shoreline.

Once outside, most groups will naturally head for the docks.

If they escaped through Area 19, they will almost certainly encounter the looters marked as Area D on the island map. Those uniforms can prove surprisingly useful later, at least they certainly did when my group played through the adventure years ago.

Running into the giant goats could be entertaining. The fire lizard is considerably less so. As for the giant snapping turtle in Area B, I would rather admire it from a distance than experience its 3 to 18 point bite firsthand.

Notes

For my money, A4 has the best artwork in the entire series, with only A3 coming close. The combination of Erol Otis and Jim Roslof is pure old-school TSR gold.

Being a lifelong James Bond fan, I also cannot help thinking this entire setup violates the Evil Overlord List. If you really want to eliminate your enemies, there are much faster and more efficient ways than stripping them naked and tossing them into a dungeon full of monsters.

One oddity I noticed concerns the dungeon map. Two locations are marked "See Detail Map," but unless my secondhand copy is missing a page, those detail maps simply do not exist. It is hardly a major issue, but it is another small inconsistency. EDIT: I believe there is errata for it somewhere or it was fixed in the Super Module A1-4.

Strengths

The adventure's greatest strength is its premise. Taking everything away from the players forces them to rely on ingenuity rather than equipment. Even experienced groups suddenly become cautious because every rusty dagger suddenly matters.

Another overlooked strength is the Slave Lords themselves. Between A3 and A4, we are introduced to a full roster of memorable villains. More importantly, the series provides enough background material to use the Slave Lords as recurring campaign antagonists rather than one-shot villains.

Suderham also deserves another mention. Despite my criticisms of A3, I still think it has the potential to become an outstanding campaign city. In fact, I have seriously considered making it the centerpiece of a future Castles & Crusades campaign, albeit with a larger map.

Among the dungeon encounters, my favorites are Areas 17 and 21. Any module featuring a roper immediately earns points from me, and placing one at the junction of two tunnels creates an excellent choke point. The Cave of Bats is another standout encounter, helped considerably by the fantastic illustration on page one.

My favorite section of the module, however, comes after the dungeon.

A4- In the Dungeons of the Slave Lords; Suderham in flames!
Suderham in flames!

The real magic begins once the volcano erupts and the island descends into complete chaos. Lava, poison gas, magmen, terrified refugees, and panicked mobs all combine to create a wonderfully desperate atmosphere. The docks, in particular, capture the feeling perfectly. Looking over the illustrations while reading those pages gives a genuine sense that everything is collapsing around the players.

The Water Dragon is another excellent touch. The surviving Slave Lords are wounded, hurriedly preparing to flee, and trying to salvage what remains of their operation. It feels desperate, chaotic, and entirely believable.

One amusing thought always crosses my mind, though.

The players finally reclaim their equipment, defeat the Slave Lords, seize the galley, and celebrate their escape.

Then the Dungeon Master asks one simple question.

"So...uhhhh...who knows how to sail a galley?"

Cue the sound of crickets...

Weaknesses

The biggest weakness is also one inherited from A3.

For the adventure to function exactly as written, the entire party must be captured at the end of A3. I have never been particularly fond of the explanation that Mordrammo conveniently resurrects dead player characters simply so the adventure can continue. Personally, I would rather introduce replacement characters in the dungeon itself than rely on that amount of narrative hand waving.

Then there is the back cover.

What on earth is that vampire doing there?

I have read this module numerous times and still cannot connect that illustration to anything inside. Since it is by Bill Willingham, I am willing to forgive it, but it remains a mystery.

And while we are discussing the cover...

Pink?

Really?

The largest issue, however, is the inconsistency between A3 and A4 regarding the Slave Lords themselves.

In A3, we are presented with five Slave Lords while repeatedly being told Suderham is the City of the Nine.

Fast forward to A4, where we are informed that six Slave Lords survived the earthquake.

Unless my math has gotten considerably worse over the years, five plus six equals eleven.

So what happened?

Did the Slave Lords practice hot-bunking like sailors? Did some have to stand during meetings because there were only nine thrones? Were there emergency promotions after the events of A3?

More likely, it was simply an editing oversight.

It is hardly a deal breaker, but once you notice it, you cannot help smiling every time you reread the series.

Closing Thoughts

As written, A4 is an excellent adventure built around one of the most original premises TSR ever produced. By taking away the party's equipment, the module forces players to rely on their own ingenuity instead of simply reaching for another magic item.

Once they finally escape the dungeon, the adventure never really lets up. The race across an island collapsing into volcanic chaos provides a fitting conclusion to the series and keeps the pressure on right to the end.

My only real reservation lies in the transition from A3 into A4, which requires a fair amount of Dungeon Master intervention for the setup to work smoothly.

Even so, I highly recommend A4.

Run your players through it. If they are willing to embrace the challenge rather than complain about losing their equipment, they are likely to remember it for years.

I'd be interested to hear your thoughts on it.

NOTE: the original review on Dragonsfoot can be found here

Monday, July 27, 2026

A3- Aerie of the Slave Lords – Old School AD&D Thoughts and a Review


NOTE: Way back in 2011 I reviewed the entire Slavers series on Dragonsfoot. As I now improve my blog, I'm moving all my content from around the web to here. This is the second review in the A Series for AD&D.

A3- Aerie of the Slave Lords 

By Allen Hammack
An adventure for characters levels 4-7

Ahhhh, A3, the penultimate module of the A series and perhaps the most mixed bag of the lot...

Before I get into this one, people should be aware that none of this is to be taken personally. This is a review. I’d still play or DM A3, it’s just that as written it’s a bit weak and certainly the weakest of the four in the series, in this writer’s estimation.

At 28 pages, A3 is the same page length as A4. But in a lot of ways this one seems, to quote Bilbo Baggins, a bit "thin, like butter scraped across too much bread", sparse if you will. I think the nature of these being tournament modules that were later fleshed out, combined with the Spartan-like nature of this one, creates a bit of a conundrum.

Having assaulted the Slavers’ operations in A1 and one of their way points in A2, the PCs are now on their way to the abode of the Slave Lords themselves, the City of the Nine, Suderham. See my notes on this in my review of A4.

Having been suitably directed from A2, the PCs find themselves in the badlands of the Pomarj near a peak in the Drachengrab Hills. Before them are four narrow caves to enter, and from there they enter a maze?

To me, the cave map in A3 is the clearest indication that this is a tournament module. It’s not bad, it’s simply showing its roots. The explanation of Mad King Olarek using this maze for his political prisoners? Ok, I guess...

Anyway, diving in we get some gnolls, which is nice if for no other reason than a change of pace from orcs in the previous modules. After that it’s a piercer cavern, which at 4 to 24 points of damage is enough to ruin anyone’s day, especially in a tournament.

More gnolls and hyena-dons feasting follow...

Next up is the first real gotcha moment of the module: Room A5. Now the trap is not that devious per se and can be partially circumvented. It’s more a case that there is no way around it. Some would say, "Well duh." That’s not my point. My point is that if you use the NPCs from the tournament as a guide, no one is going to have a fly spell. So swim through they go, taking 1 to 4 points of damage from exertion? Ummm, ok.

The thing that makes the room cool is the quirky Sword of Lyons.

I’ll skip the Stroper, as there are plenty of other monsters to bag on in 1st Edition. These merely get a "meh" from me.

Last but not least, the big bad at the end of the maze is... Wimpell Frump?

You’d think that these ace Slave Lords would have someone more accomplished covering their secret escape route, or at least someone with a better name. Also, it’s apparent from the layout of the dungeon that the illusionist spends all of his time hanging out here, as he has no means for a kitchen, bedroom, or even a garterlobe. Perhaps some illusions to cover that one corner take care of that?

I’m sure some will start gushing because he’s an illusionist and illusionists are uber-cool, you see. Um, yeah, next.

From here we get to the next part, Part B, the City itself. This is accomplished via a long tunnel leading to Scum Slum, the outskirts of Suderham.

And being (stop me if you've heard me say this): it’s a tournament module, the rush is to get to Part C. This is a shame really, as I, like a lot of people, would want more meat on the bone regarding Suderham. The intro and flavor text paragraph is cool and evocative, bringing to mind the description of the Drow city in D3.

Right off the bat the train tracks become apparent. Some old geezer waddles up to the PCs and basically gives them their first clue without doing anything. Again, in a tournament setting this makes sense. It’s important information, a bit cryptic, but smart players will figure it out easily.

It’s also a bit too easy for my tastes unless you’re in a tournament setting. As a campaign, I’d be tempted to have the PCs explore the city and give them enough rope...

Given that the PCs arrive at night, large swathes of the city are closed up while the nightlife is bustling. This is again a construct of the tournament structure. The goal in the tournament was to make it through this section in three hours. Obviously, as a DM, this will require a lot of going it alone for a campaign.

As noted, the nightlife is hopping in Suderham, although why go out when you could be dude pimping it on page 14!

In any event, almost all searching is eventually going to funnel the PCs to B13 and finding the way in through there. A longer campaign might allow for B68.

The inns, bars, taverns, etc. are all filled, as are the Houses of Ill Repute. Imagine the snickering of my 8-year-old self at those when I first read them!

Most players are going to start trolling these for additional information. Another point is that with the city being in "night mode," some PCs might try for mischief right off the bat. Let them. It will bring their attention to the Slavers that much sooner, like if they poke their heads into the Assassins Guild at B18.

Assuming they finally figure things out, there are two ways into the Catacombs in Part C: one by following the clues at B13, and one by chance at B68. It doesn’t really matter, as they both spill into area C1 below.

From there they encounter a Flesh Golem with some extra umph. Assuming they get through him, next up is a mimic, some traps, a Minotaur, obviously a transplant from the maze in Part A, a Gelatinous Cube, Shambling Mound, snakes, and then the Slavers themselves.

A3- Aerie of the Slave Lords black and white illustration
Putting that 18/56 strength to use!

Notes

Errr, the Jeff Dee art! Interestingly, I do like the Dee cover.

I mentioned in my A4 review that A3 has the second-best art overall. That’s because there is more Erol Otus and Bill Willingham stuff in it, which me likes. "Ogre" punching Feetla’s shield is kick ass!

I like the location of the city to a degree: on a large lake, on an island, with a volcano. Cool. Can’t imagine what’s going to go wrong with an extinct volcano in the not-too-distant future, however.

If you are into old-school sparseness, it doesn’t get much more sparse than this, maybe except for a Marine barber shop on Paris Island.

The city is numbered with only the barest of descriptions and the like. Want proof? The city is covered in seven pages of text. That has to be some kind of record.

These are assigned A1 to A4, but why? Shouldn’t they have C designations?

Strengths

Our first real look at high-level NPC baddies is the best part of module A3. The five presented are rather iconic and make for great recurring villains.

Suderham, if expanded on, makes for a great city in the scummy sort of way. Who wants cities of shining white and paladins? Not me. Give me gritty and sleazy any day of the week. There is much more to do and explore.

By and large the art is good and fits the piece well. Of particular note is Bill Willingham’s Stroper and the Arabian-attired dude with the harem girls. Otus’ weird-looking gate guards are way cool as well and depict the vertical nature of the walls looming before the PCs.

A one-of-a-kind weapon: in our heart of hearts, us geeks love the basic snippets of stuff in modules like the "legendary" Sword of Lyons. Why is it legendary? That’s for an individual DM to decide.

Weaknesses

The maze at the start.

I noted some points above, but let’s just say it works for a tournament module but not much else. The map is a one-way maze and all that entails. As a player it would most likely annoy. As a DM it could possibly bore you. Your mileage may vary.

The whole island, city, and slums are cramped. Some might like it, but we are talking about city walls that enclose an area of 400 by 400 feet. If I were running this, I’d redraw the map, at least in terms of scale, to make it, as Hannibal Lecter would say, "roomier."

The general layout of the island I have no problem with, nor the crater lake. I simply think the distances are too small. But where am I getting this from, I hear you ask?

Look at the scale on the map on page 28, then compare it to the inside cover map and its scale for the city: 600 feet by 600 feet. In any event, it’s too small for my taste, and the scale seems out of whack. At 600 by 600 yards it’s a bit better, but still not perfect.

Another thing that bothers me is the inconsistency with the city itself. Since the focus is not on the city and it merely serves as a vehicle to gather clues to get to Part C, why are they going into detail about some buildings?

By this I mean consider B16, the Assassins Guild. Is it important to know the membership fees for the guild? In a tournament, no. In a campaign, yes.

This could be a construct of trying to make the modules more user-friendly for a campaign. It’s just that I have a hard time believing these details were in the tournament module, mainly because they would serve no purpose there.

The nature of just who knows what in the city is another issue. Take the bartender at the Sign of the White Knight. Again, we get cryptic responses and no straight answers. I get it supposed to be mysterious but even for the time it falls flat.

A3 In the Dunegons of the Slave Lords- Sign of the White Knight

Or the Maps and Charts library: "Where those that bear us reside." Ok, first thought, couldn’t that mean females since they bear children? Of course horse makes sense, but this could be confusing, to say the least.

That damned Flesh Golem at C1. You’d think an outfit swimming in loot from all the slave dealings would have more than a measly Flesh Golem with pimped-out iron add-ons. C’mon, Stone Golem here at least!

I’m not buying the pseudo-Iron Golem shtick as a player. Because if it were true, I’d either run if I could or say to hell with it, as I probably don’t have anything that could dent it.

Going hand in hand with this is the ecology of the dungeon, either one. Part A is better, mind you, but Part C? Ugh.

S4 is the poster child for this, but I might be tempted to rank A3 right up there with it. There are a bunch of critters who have to eat, but the straightforward, no-deviation-allowed dungeon design makes it rather implausible.

I know it sounds like a broken record, but once again tournament design is rearing its head.

As with the other modules in the A series, the rewards are few and far between. This is truly the case here, as both "dungeons" have some tough foes for the levels of the party, but little to show for it.

This can be hand-waved by saying why would the Slavers leave such things around? You’d be right in saying that, and I’d agree with that point. The problem is the players might not be happy with the rewards considering the risk.

Closing

In closing, I think A3 has the most problems out of all of them and is the most apparent as a tournament module. In order for it to be more workable, a lot of it has to be redone.

Likewise, people have been arguing over its ending probably since it came out as a published module. As a result, we are not going to end the debate here, that’s for sure.

The capture of PCs intact and not dead is one of the most difficult tasks ever without it being seen as contrived. A far better solution is that if a few PCs die, allow new ones in the dungeons of A4. It’s rather easy to do. Just roll them up and don’t worry about gear.

You’ll note that the strengths section is a bit lacking. That’s not to say that I don’t like this module, far from it. Rather, it’s a case of what I noted several times: sparse.

Seven pages, nearly one quarter taken up by the city, which if used as written the PCs breeze through. That is going to impact the quality, and it does.

The first dungeon is lackluster, and the later one is a bit improbable.

Obviously, I’d use A3 as a starting point and flesh it out from there. There are enough pieces here, in conjunction with A4, for high-level baddies for years to come.

After all, the Slaver operations aren’t just one temple in Highport and one Stockade on the way to Suderham. In fact, you could treat them like trying to grasp Jell-O. The harder you squeeze, the more mess ends up on the floor and the less you have in your fingers.

The Slavers should be used as a great source of material rather than just monsters. That is, at least, my take on it.

Despite its flaws have you played A3?

Wednesday, July 22, 2026

A2- Secret of the Slaves Stockade – Old School AD&D Thoughts and a Review


A2- Secret of the Slaves Stockade cover art

NOTE: Way back in 2011 I reviewed the entire Slavers series on Dragonsfoot. As I now improve my blog, I'm moving all my content from around the web to here. This is the second review in the A Series for AD&D.

A2 Secret of the Slavers Stockade
By Harold Johnson with Tom Moldvay
An adventure for characters levels 4-7

A2 is part of the much-loved A-series and is written by Harold Johnson with Tom Moldvay. The last page notes “Special thanks to Tom Moldvay, without whom this module would not have been finished.” One wonders what production headaches led to that line. My guess? It ran into serious issues before it went to print aka deadline crunch.

At 40 pages this one is a bit bigger than the rest of the series, and it just might be my favorite of the lot. Along with A1, A2 represents some of my first forays into AD&D — and it’s personal. I still have the character I adventured with back then: a ranger named Leif Garwind. (We were studying Vikings in school at the time, so sue me.)

Let’s start with the outside: Roslof cover art? Check. That gold-ish tone instead of A4’s unfortunate pink? Check. Erol Otus cloaker on the back cover that actually makes sense? Check. With the presentation and the maps inside, we’re off to a strong start.

The PCs arrive outside the fortress thanks to the hook from A1 - Slave Pits of the Undercity. Getting in is no easy matter. There’s essentially one main entrance staring you in the face (barring the obscure Area 39 route). The gate guards are nothing special, but the anhkheg at Area 5 combined with guards on the walls and flaming oil from Area 6 is a recipe for a very quick TPK aka ("Total Party Kill). As a Dungeon Master I love anhkhegs for item saving throws and general chaos, but this opening gauntlet is brutal.

Assuming your party survives the meat grinder (or sneaks in another way), the rest of the compound opens up, though it’s rarely easy. Area 13 can mean instant capture if you’re not careful. Area 19 has that classic old-school wackiness (supernatural events that are actually ruses), which I enjoy in principle but felt a bit forced here. The cloaker at Area 25 is legitimately cool and can absolutely ruin a party’s day.

The half-orcs, hobgoblins, and slave-taking flavor build a nasty little ecosystem. Then you hit the real bosses: the Executioner (Area 32), Icar the blind fire-loving swordsman (Area 5), and especially Markessa in her laboratory (Area 22). Markessa is properly unhinged — chaotic evil experiments on slaves to create the “perfect” servant. The fight there, with its owl bears and body horror, still stands out.

Below ground the slave pens and caves add another layer. The varied prisoners (including potential future allies) give the module real campaign depth. The whole place just feels lived-in and nasty in a way that rewards multiple reads.

Notes

  • Less Jeff Dee is generally better, though I do like his Icar piece. His stuff works for other games, less so for fantasy in my opinion.
  • Otus and the other interior art  (minimal as it is) still carries the module.
  • The maps are some of the best fortress layouts in early AD&D. They are clean and clear and are believable for the environment.

Strengths 

One of the greatest strengths of A2 is the detail of the maps. If you’re like me, A2 represented one of the best early examples of a fully realized castle/fortress in published AD&D. It was fascinating to my eight-year-old self; back when my friends and I were figuring the game out with no one teaching us. The map is dense, with lots of ground to cover and a believable, lived-in feel. The crumbling, partially repaired construction of the fort adds atmosphere, and little touches like the madman playing mind games with the hobgoblins (climbing around in areas 16a-f) give the place real personality. 

This is the module that feels the most like a real, functioning evil outpost. The NPC leaders have personality (especially crazy Markessa and fireproof Icar). The mix of monsters, traps, and role-play opportunities is strong. It oozes atmosphere and has that slight Warhammer-adjacent grimness I loved even back then.

An overlooked part of A2 in my opinion is that it introduces a number of iconic AD&D monsters: boogle (obviously an homage to Gollum), cloakers, phantoms, and haunts. This wasn't suprising for early TSR modules: new monsters and magic items were par for the course.

Weaknesses A frontal assault is borderline suicidal for a typical 4-7th level party. The defenders are well-positioned, and reinforcements or alarms can snowball fast. Some of the traps and set pieces (the swinging chandelier, for example) feel a bit contrived. Loot is better than A1- Slave Pits of the Undercity, but still modest for the risk unless you’re running the whole series.

Closing A2 isn’t perfect, but it’s the strongest of the A-series for me. It has the best mix of atmosphere, memorable villains, and that lived-in slaver-fortress vibe. If your party is smart (or lucky), it becomes a nasty, rewarding crawl. If they’re not…well, bring spare characters.

The original review can be found here on Dragonsfoot.

Have you run or played A2? Did the fortress assault go as badly as I suspect it often did? Let me know in the comments.

Sunday, July 5, 2026

T1 Village of Hommlet Guard Tower Terrain Build – 28mm Oldhammer / Greyhawk Campaign Project

Completed 28mm scale Hommlet Guard Tower terrain piece in a scenic setting for Greyhawk campaign use
The Guard Tower in the Village of Hommlet
 

Over the years I’ve created a number of terrain pieces, many of them focusing on castles and forts, many featured here on the blog.

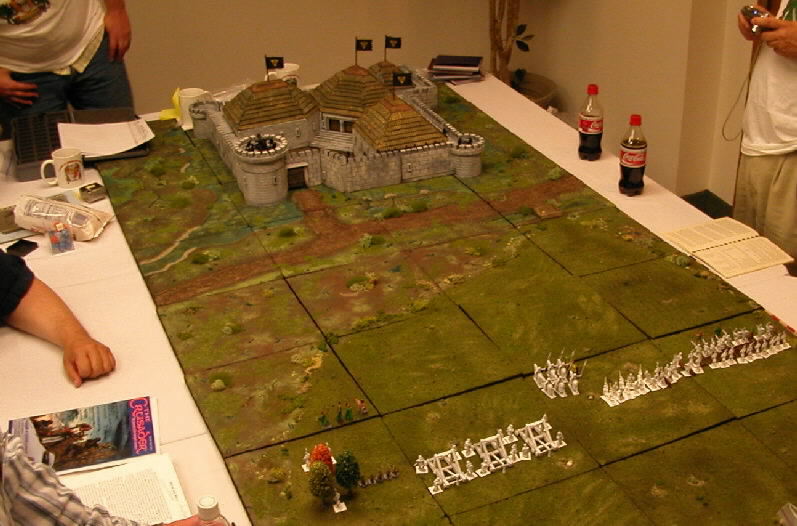
In that vein, for my Greyhawk Campaign I’m running I decided to make the Guard Tower from T1 - The The Village of Hommlet. The natural question is why not create the Moathouse, since that’s where the adventurers will mostly be plying their trade? The answer is simple: way back in 2006, Paul Stormberg commissioned a scale model version for a wargame of Chainmail which Gary Gygax himself participated in.

So rather than create another one, I settled on the Guard Tower (area #31) and have been working events in my Greyhawk campaign in which the tower will feature. But that is very much in the future, so I will just focus on the construction of the tower itself for this post.

The first step in construction was making a copy of the tower floor plans and taping it to the shelving in front of me on the painting table for reference through the whole thing. This was very helpful as I didn’t have to keep looking over to the module itself.

On that subject the floor plans of the tower were helpful. The illustration on page 7 and the back cover were less so. At least the illustration on page 7 did give me a good idea of the stairs if nothing else for later. The back cover really doesn’t tell much for this nor does the original cover art. This isn’t a criticism per se, it’s just noting for what I needed they would not be used as my guides.

To start the Material List:

  • Cardboard
  • Thinner cardboard (the types from cereal, snack, or cracker boxes)
  • Toothpicks (for the arrow loops and trap door on the middle tower)
  • Popsicle sticks (for the drawbridge and flooring of the 2nd floor)
  • A round container of oatmeal (serves as the middle tower)
  • Small finishing nails (for the studs on the door to the middle tower)
  • R4 residential foam (the base)
  • Pressboard (for the base of the 2nd floor)
  • Posterboard (for the battlements)
  • Paint
  • Superglue
  • White glue
  • Glue gun
  • Xacto knife
  • Stone gravel and green flock for the base
  • Coping saw
  • Dremel tool
  • Small electric drill
Construction
I actually started on the creation of the tower in early November 2025, but got sidetracked. Sidetracked by what you ask? My Citadel Giant, that’s what! When I picked it back up the tower was in the basic state noted here in the first photo. One of the initial challenges I had to work out was creating it in 25/28mm scale. It was going to be big no matter what. As I noted, I’ve created several castles in 25/28mm scale before along with a lot of buildings, but the initial cuts always seem “too big.”
Early WIP of the 28mm scale Hommlet Guard Tower basic cardboard form on the painting table
Very, very early WIP

The second challenge is that the interior was going to be a chore to even get remotely passable in terms of usability. For a while I debated on the wisdom of doing so. In the end I knew I’d have to create the interior and made peace with it. At the same time, looking at the floor plans I knew it would be impossible to do exactly as is. It was also at this stage that I decided to omit the lowest level as that was going to add another level of complexity and to the overall height.

The third and final challenge was using flat surfaces in a round structure. Trust me, it’s much more difficult than it sounds. Cardboard can be bent and cut, yes, but some shapes are not easy to do.

The first big task was to get the shape the right size for the tower proper along with the two flanking towers to be circular. I was ideally looking for a circle the size of a bucket but none fit what I was roughly measuring out. Through some trial and error I got it right after the second try.

Once that was done, creating the vertical walls was somewhat easier. The glue gun was invaluable here, keeping everything set while I added the next piece and the next. In short order the basic form was set and I went over the glue gun joints with white glue to reinforce them all. Then the tower sat for a number of months.

When I picked this back up about a month ago, I remembered the interiors would be a chore, but so too would the stone work for the outside. As you can see from the work in progress photos it was a LOT of cutting and gluing with the glue gun.

For the materials to make the stone I fortunately saved snack boxes over the years for construction. The excellent How to Make Wargames Terrain book from Games Workshop is invaluable for this. I have a copy but it has been out of print for decades (the 1996 version is the best in my opinion).

The attaching of the stone to the outer surface was a long process over about two weeks. As you can see it became something quite garish from all the clashing colors as I went! (see the photo to the right). The primary challenge here was containing/corralling the glue from the glue gun. The glue sets quickly and speed is needed to get the part in question into place before it sets without excess glue or wispy strings. The good thing is after doing it so many times it got to be second nature.

The first interior work was the hardest: the ramps. While it works fine for an adventure in role-playing

Color explosion during stone cladding on the 28mm Hommlet Guard Tower – snack box cardboard in progress
Color explosion!

games it does not work well for a modeling project, nor for lining up arrow slits. Hearkening back to my Nippon castle from several years ago I was eventually able to get the ramps passable and removable from the interior. Not perfect, just passable. I really, really wish Gary would have done something different here… The interior stones? As said it wasn’t easy, but I did get into a rhythm in some spots and listened to several podcasts to while away the time as I toiled.

The battlements were the next stop after the interior. Once again, a previous project helped here. I have not posted it yet, but I have created an entire Empire castle (see the very end of the post for more on this) roughly based on the Warhammer Mighty Fortress. In that castle project I figured out how to make battlements from poster board and to do it in such a way to expedite the process. Basically the key breakthrough was to lightly score the flat section that forms “in between” each battlement and fold it down. Coupled with a slightly higher battlement section behind, the two were glued together leaving only the sides of each battlement “tooth” to be completed.

The big roadblock here? As you guessed it, doing this on a round surface made it tougher. I had to account for the circumference being smaller on the interior than the exterior. Through trial and error I worked it out and then started attaching sections to the upper tower base.

The next big challenge was the roof and machicolations on the removable tower top. The machicolations took quite a while to get right as the spacing was at best an inexact science. Several times I needed to cut already glued sections off to get the whole to fit right. But after a while—with a lot of putting the top on, marking the under-hang, and popping it off—I was able to add them one by one.

Another point of note was the central tower itself. I’m fairly sure oatmeal containers are not designed with hobby terrain in mind despite being the perfect size and shape (let alone being sawed through). Because of that, getting it to set level took some time and some shims. In the end it worked perfectly with the right shape and diameter.

Removable tower top with machicolations and Wizkids catapults on the 28mm Hommlet Guard Tower
Removable top and catapults

Once the base construction was done and I repeated the method for the battlements on the upper level, it was also time to repeat the steps for the machicolations on the middle tower to finish it off. The final push of the “stones” commenced, wrapping the middle tower surface all the way to the top and adding the trap door.

It’s important to note that I did not make the middle tower removable like the lower. The interior sections of the lower tower showed me that actually getting my hands into an even smaller diameter was going to be a problem. On the lower sections it was barely possible, and I wasn’t looking forward to that again. At that point I made the executive decision to skip it.

Next up was the base. The base was nothing more than cut R4 residential foam (which can be found at a home improvement store) with a depression hollowed out for the tower to sit in. That got to be quite messy with cutting and sanding to get it to fit right. In the end, like the middle tower, it required a few shims here and there for it to set level. This did not matter too much as I knew they would be covered up when I added the gravel to the base. The base was set with copious amounts of white glue and left to dry overnight.

The next night I scored the base in several sections and used white glue to attach the stone gravel and let that sit overnight.

Painting

When it finally came time to start painting, the weather does what it always does around here: turns the humidity up to 11. We all know what that means — no spray paint. But as I was contemplating that, I knew it would have to be primed by hand anyway. Spray paint and cardboard don’t usually adhere well. As it was, a solid evening ended up being devoted to priming the tower black. I needed two coats in most places as the “shiny side” of the thin cardboard needed to be facing out (the inner side is too rough and too porous, which would cause warping).

Once primed, the first step was to dry brush the tower gray. Now it might seem like the more straightforward thing to do is simply coat the whole thing gray. While that can be done, it also wasn’t what I was going for. Painting structures like this uniformly gray makes castles/towers look "cartoonish" in my opinion. I wanted the dark shades to come through.

After the initial color, next up was lightly dry brushing straight white onto the surface. This was done very lightly for highlights and not to turn it white. After the white came something that might seem unusual for a color, but something I did with the Empire Castle: a dry brush of a lighter orange. This might seem odd, but what it does is make the rock seem more realistic, especially with what I knew I’d be doing in the final painting step. I went from the base on up to the removable tower top. Once done I did notice the upper level was too "orangish," but no matter.

Why I didn’t worry about “too much orange” was because of the last step in painting the tower: a light wash of black. To achieve this a mix of a very watery black wash was all that was needed. In most cases water and cardboard do not mix; warping can occur. But because I sealed it off with two undercoats I was fairly certain it would hold up well. Rather than simply dousing it with the watery paint, it was applied via brush with broad strokes to cover all the surface areas. I actually did three passes in total to get the coverage desired, letting it fully dry between passes. What this achieved was a surface that looked like natural field stone, the kind that was likely being used as a building component for the small keep being constructed in Hommlet, of which the Guard Tower is part.

The final part for the tower proper was the creation of the stone steps. Through some trial and error I got the foam “stones” to sit right for the most part and it was a simple matter of cutting, sanding, and gluing everything to get to its final shape. The painting process was the same as for the exterior of the tower itself.

Yet to Complete

At the time of posting this the second interior level is fully constructed, removable, and primed but not yet fully painted. I’ll add a followup post to this one when it’s complete. Also, the shield above the gatehouse likewise needs to be finished with the coat of arms of Hommlet.

Closing thoughts

In all I’m pleased with how it came out and it was a fun project to work on in the man cave. There are a few minor mistake areas, but not enough that people would notice unless looking really hard (one section of the battlements has a wider gap than I had anticipated and one arrow slit alignment issue).

One happy accident was the area of the placement for the catapults. I hadn’t set out with placing the engines there but imagine my surprise when the plastic ones from Wizkids just fit inside. Even better was the fact that I got four of them from the local gaming store reduction bin for something like a total of $10. I was originally going to create them out of balsa wood but this saved me time.

Another happy accident? Rufus the fighter who inhabits the tower? I was able to represent him with one of my Ral Partha miniatures which is actually one of the oldest minis I have in my collection. He was not mine originally but got passed down to me when my older brother stopped playing AD&D. There is something cool about the axe-wielding mini from the early 80s paired with the recently completed tower.

Overall, I hope when it’s needed in the campaign it will be a “big reveal” moment and the players will appreciate it. I’m not saying too much just yet as one of my players follows my blog. If nothing else

Completed 28mm Hommlet Guard Tower terrain piece with battlements, steps, and catapults for Greyhawk campaign
The finished Guardhouse!

then at least I got to share it with the wider gaming community.

I’m also pleased that in the end I decided against recreating the Moathouse itself. Others have already done it and done it quite well; no need to revisit. In a way it adds to the overall story of folks creating terrain for T1 – The Village of Hommlet… Does this now mean I need to make the Church of Saint Cuthbert too, or the Inn of the Welcome Wench?

One final note: as I’ve done plenty of these projects, one thing that always surprises me every time is the amount of waste material these things generate from all the cutting and sawing. It behooves you, at minimum, if attempting a project like this to clean up at least every night or it gets messy fast. This build I was very disciplined — after finishing each major section I had the hand broom out sweeping and was using the shop vac regularly. The sanding and cutting of the base was even more so. Trust me, your hobby area will thank you for the diligence.

For reference as completed: the tower is about 19½ inches tall, 13 inches wide, and 13 inches in depth.

There you have it — the Guard Tower of Rufus and Burne from TSR’s T1 - The Village of Hommlet.

As I noted about the Empire Fortress project above, that project really was using leftover parts from my abortive attempt to create Castle Von Wittgenstein from the Enemy Within campaign for Warhammer Fantasy Role-Play. I stopped that project because of the sheer size and scale along with the limited utility of it. The part I reused was what became the gatehouse. I’ll be posting about that in the not too distant future. It’s also ironic that project was inspired by the Moathouse too.

What are your thoughts on the project or the Village of Hommlet in general? 

End note: as I noted about the Empire Fortress project above. The project really was using leftover parts from my abortive attempt to create Castle Von Wittgenstein from the Enemy Within campaign for Warhammer Fantasy Role-Play. I stopped that project because of the sheer size and scale along with the limited utility of it. The part I reused was what became the gatehouse. I’ll be posting about that in the not too distant future. Its also ironic that project was inspired by the Moathouse too.